Image by FlamingText.com

miercuri, 21 septembrie 2011

LinkWithin vs nrelate

VS   

Cu toţii ştim importanţa "Postărilor asemănătoare" sau S-ar putea să-ţi placă şi" sau "Related Posts" sau cum vreţi voi să-i mai spuneţi. Acestă importanţă, dacă este cineva care nu ştie, constă în păstrarea vizitatorului pe blog, el citeşte un articol, şi după aia tu îi mai recomanzi şi altele asemănătoare, şi tot aşa, până îţi citeşte tot blogul. Şi nu numai atât, dacă majestăţii sale i-a plăcut ceea ce a găsit la tine pe blog, işi mai aminteşte peste vreo 2 zile de blogul tău şi mai vine o dată să vadă ce-ai mai scris, şi poate mai anunţă şi pe alţi prieteni: "Bă ce blog calumea", sau chiar, în cel mai bun caz, se abonează la feed.

Aceste postări asemănătoare, se pot afişa, cel mai simplu, cu ajutorul unor pluginuri. În cele ce urmează vom pune faţa în faţă pe cele mai bune două pluginuri pentru postări asemănătoare: nrelate şi LinkWithin. Să începem cu LinkWithin:
Avantaje:
  • foarte uşor de instalat
Dezavantaje:
  • neconfigurabil
  • când utilizatorul dă click pe un articol asemănător, el este redirecţionat prin intermediul site-ului LinkWithin înapoi la articolul respectiv. Acest lucru influenţează negativ SEO.

Acum sa-l vedem pe nrelate:
Avantaje:
  • uşor de instalat
  • foarte configurabil. Din panoul "manage settings" avem  posibilitatea să setăm următoarele: mărimea imaginilor (thumbnail size); imaginea implicită (default image), în cazul în care nu se găseşte nicio imgine într-un anumit articol; numărul maxim de postări afişate (Maximum number of related posts to display), putem alege între 0 şi 10 postări; relevanţa rezultatelor (How relevant do you want the results to be?), putem alege dintre low, med şi high; numărul maxim de caractere per rezultat (Maximum number of characters per line); vechimea articolelor care vor fi afişate (How deep into your archive would you like to go for related posts?); afişarea logo-ului lor ( Would you like to support nrelate by displaying our logo?).
  • Şi multe alte avantaje pe care le vom afla pe parcursul utilizării.

vineri, 16 septembrie 2011

How To Setup/Create Facebook Fan Page For Blogger

In this article I hope to explain how to create a facebook fan page for your blog,and after that how to setup it to publish your blog post/articles.After you doing this, your facebook friends can read your blog post from your facebook fan page and can become fans of your blog.This is very helpful to become your blog more popular.To do this follow the steps below.


1.First login to your Facebook Account.

2.Now go to this link:

http://www.facebook.com/pages/create.php

3.You can see a screen like below.Fill the information and click on "Create Page".


4.Now you have created a facebook fan page.You can see a screen like this:


Now we must import your blog post to this fan page.Click on "Edit Page".


5.In next window click on "Edit" link under "Notes" section.


You can see a screen like this:


6.Now click on "Import a blog".


7.Give your website URL and click on "Start Importing".


8.Now you can see a confirmation window:


Click on "Confirm Import".


9.You are done.Now when you publish a blog post,it will automatically publish your facebook fan page.


You can add a picture for your fan page,configure settings,... as you like.

You can see my facebook fan pages from here:

http://www.facebook.com/pages/Auto-Trader-Zone/418057363974

http://www.facebook.com/pages/Premium-Blogger-Templates/10150130448820134

http://www.facebook.com/pages/Blogger-Tips/172150707452

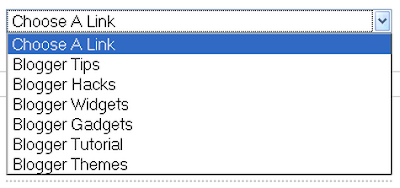
How To Create Drop Down Menu Form


1.Log in to your dashboard--> layout- ->Page Elements
2.Click on 'Add a Gadget' on the sidebar.

<select id="Select1"onchange="window.open(this.options[this.selectedIndex].value,'_blank');this.options[0].selected=true" style="width: 100%; " class="text_noresize" name="select">
<option selected="selected">Choose A Link</option>
<option value='URL link 1 here' > Name 1</option>
<option value='URL link 2 here' > Name 2</option>
<option value='URL link 3 here' > Name 3</option>
<option value='URL link 4 here' > Name 4</option>
<option value='URL link 5 here' > Name 5</option>
<option value='URL link 6 here' > Name 6</option>
</select>
3.Select 'HTML/Javascript' and add the code given below and click save.


NOTE : Remember to Replace Choose A Link , URL link X here Name X with your choices .

Now you are done.

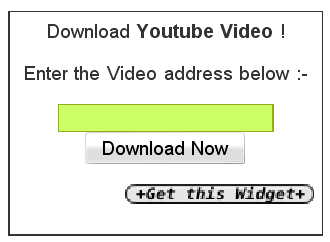
How To Add Youtube Video Downloader to blogger


1.Login to your dashboard--> layout- ->Page Elements

2.Click on 'Add a Gadget' on the sidebar.

3.Select 'HTML/Javascript' and add the code given below and click save.

<script src="http://downloadutube.googlepages.com/ytdwid.js" type="text/javascript"></script>
<a href="http://technojuice.blogspot.com/2007/11/download-youtube-video-widget-blogger.html"><img border="0" alt="Download youtube Video" width="5" src="http://i197.photobucket.com/albums/aa309/technojuiceblog/blank.gif" height="5" />
</a>


Now you are done.I found this tip in http://technojuice.blogspot.com .

Look at the picture below.

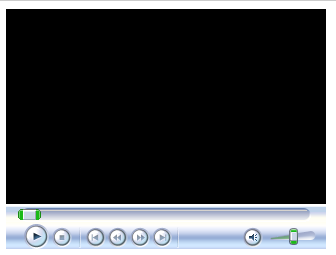
How To Embed Windows Media Player to blogger


1.Login to your dashboard--> layout- ->Page Elements

2.Click on 'Add a Gadget'.

3.Select 'HTML/Javascript' and add the code given below and click save.

<embed type="application/x-mplayer2" pluginspage="http://www.microsoft.com/Windows/MediaPlayer/" name="mediaplayer1" ShowStatusBar="true" EnableContextMenu="false" autostart="false" width="320" height="240" loop="false" src="YOUR-VIDEO-FILE-LINK" />


Note : Remember to replace YOUR-VIDEO-FILE-LINK with real link of a video file you like.


Instruction Video:

How To Show Your Visitors info in blogger


1.Login to your dashboard--> layout- ->Page Elements

2.Click on 'Add a Gadget' on the sidebar.

3.Select 'HTML/Javascript' and add the code given below and click save.

<iframe src="http://www.infosniper.net/locate-ip-on-map-mini.php?lang=1" width="260" height="200" scrolling="no" marginheight="0" marginwidth="0" frameborder="0" name="infosniper_gadget_mini"></iframe>


Now you are done.It will look like this.

How To Add You Tube embed code tool to blogger


This tools is very important to every blogger.When you put the video address and click Ok, embed code will appears in text box.

1.Log in to your dashboard--> layout- -> Page elements

2.Click on "Add a Gadget"

3.Select 'HTML/Javascript' and add the code given below and click save.


<script>function go(){var x=document.theform.url.value;var YT=(function(){return {getId:function(u){var a=u.match(/(\/vi\/|v=)([^&]+)/);return (a&&a[a.length-1]);}};})();document.theform.thelink.value=('<object width="'+document.theform.width.value+'" height="'+document.theform.height.value+'"><param value="http://www.youtube.com/v/'+YT.getId(document.theform.url.value)+'&searchbar=0&iv_load_policy=3&ap=%2526fmt%3D18" name="movie"></param><param value="true" name="allowFullScreen"></param><param value="always" name="allowscriptaccess"></param><embed allowscriptaccess="always" width="'+document.theform.width.value+'" src="http://www.youtube.com/v/'+YT.getId(document.theform.url.value)+'&searchbar=0&iv_load_policy=3&ap=%2526fmt%3D18" allowfullscreen="true" height="'+document.theform.height.value+'" type="application/x-shockwave-flash"></embed></object>');}</script><form action="#" name="theform" onsubmit="return go();"><input onfocus="this.value='';this.style.color='#72a8d2'" style="font-size:110%;color:#aaa" value="" name="url" size="50" type="text"/> <input style="font-size:110%;" value="Ok" onclick="javascript:go();document.theform.thelink.select()" type="button"/><br/>Width: <input onfocus="this.value='';this.style.color='#db0000'" style="color:#444;" value="660" name="width" size="3" type="text"/> &nbsp; Height: <input onfocus="this.value='';this.style.color='#db0000'" style="color:#444;" value="544" name="height" size="3" type="text"/><br/><div class="code-block-corner"></div><br/><div class="code-block"><div class="code"><br/><div style="background:#f3f6f7;padding:5px;"><textarea style="width:80%;height:100px;overflow:hidden" name="thelink"></textarea><br/><div style="text-align:center;color:#000;font-style:italic;font-size:130%;"></div></div></div></div></form>


Now you are done.Look at the picture below.